Canva is a fantastic, accessible tool for graphic design on the go. Its user-friendly interface and affordable subscription make it a favourite among our clients, private and corporate. Navigating the intricacies of the print world isn’t always easy, especially when it comes to choosing the best file format for print. Here’s a handy guide.
Key terms
Before getting into the nitty gritty of setting up a Canva file for print, it might be good to go over the basics first. Here are a few technical terms that will make deciphering print-industry jargon much easier:
DPI (Dots Per Inch): The term tells us how many dots of ink are applied to every inch of material—more dots equal higher resolution.
CMYK (Cyan, Magenta, Yellow, Black) vs RGB (Red, Green,Blue): These are the two most common colour modes.
Trim line: The area where the paper will be cut to achieve the final, desired size of the printed product.
Bleed: If you want your design to extend right up to the edge, it needs to extend beyond the trim line. Bleed ensures that there are no white borders in your final product.
Crop marks: They are lines printed in the corners to show the printer where to trim the paper. Don’t worry, they won’t show in the final result.
Print specifications
Make sure you also pay attention to these print specifications:
Resolution: Canva’s default resolution is 96 DPI, which is great for digital use but a bit low for print. 300 DPI is the gold standard you should be aiming for.
Colour mode: RGB works best on screens, while CMYK is perfect for print. Make sure you choose that!
Bleed settings: Remember to cover your bleed settings before sending to print. We’ll explain how in the step-by-step guide.
Setting up a Canva file for print, step-by-step
Now that we've got the basic terminology out of the way, here's how to set up a Canva file for print, step-by step.
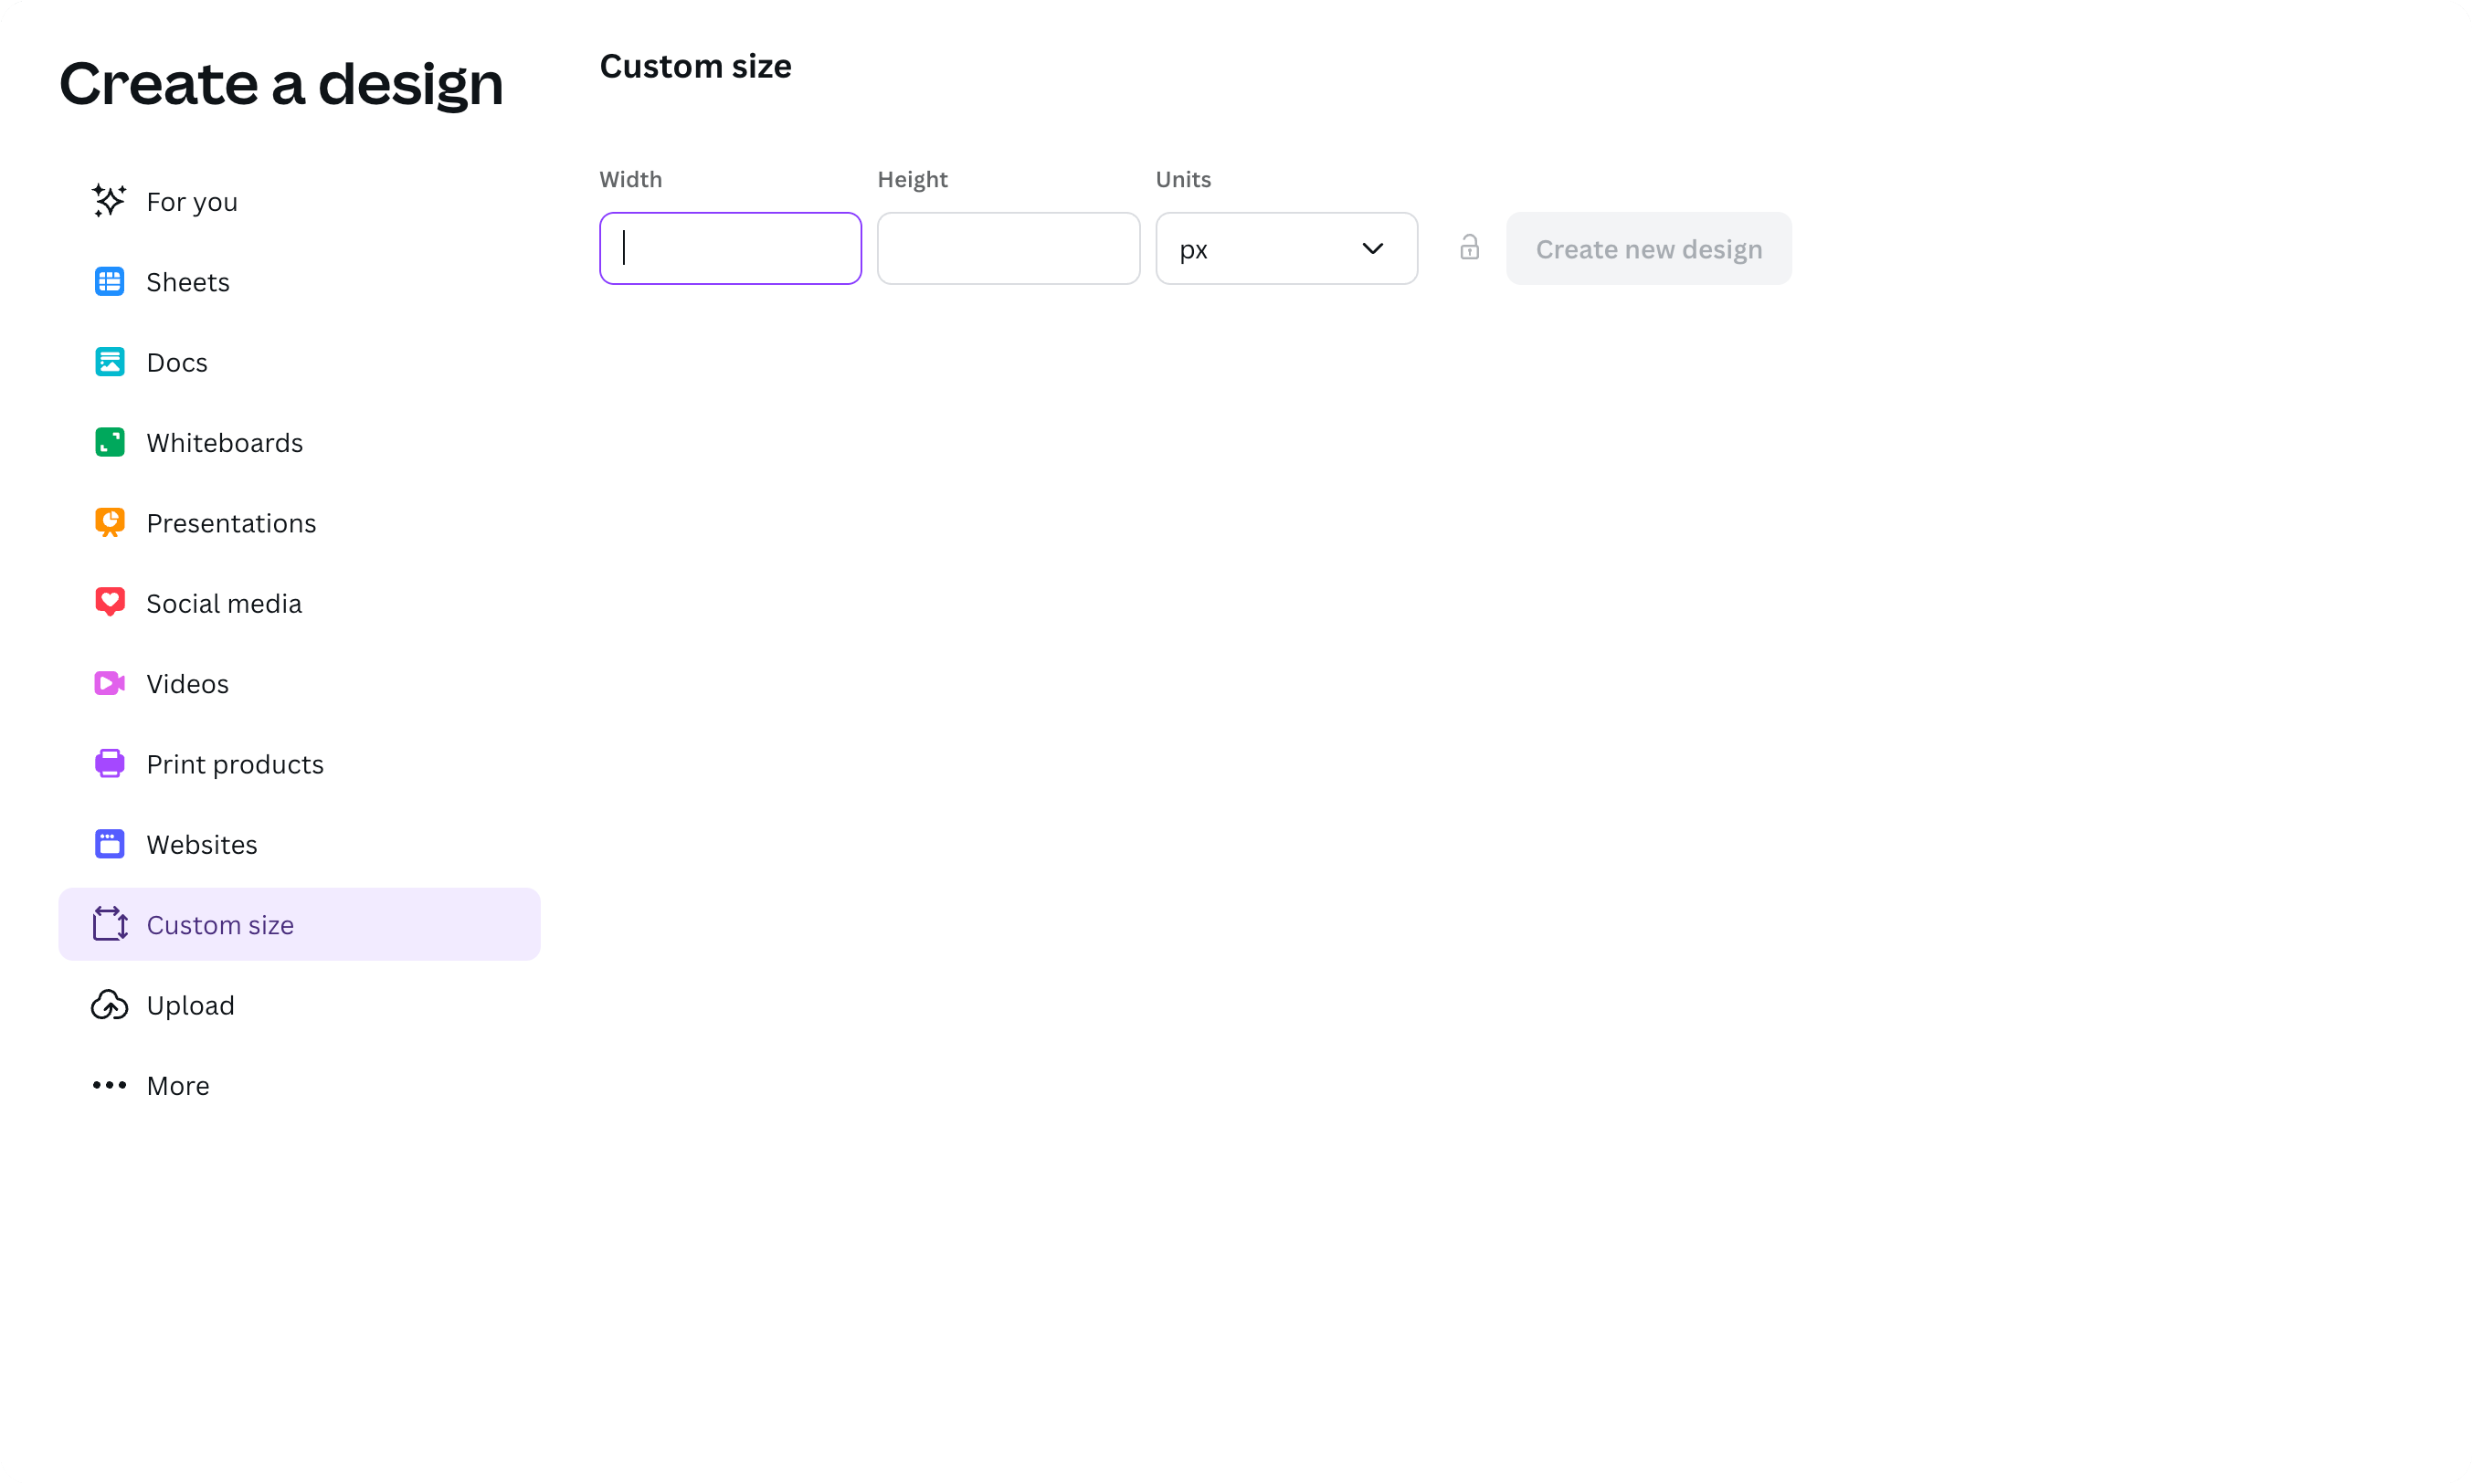
1. Choose the right dimensions
Before starting on your design, make sure you’ve chosen the right dimensions for your piece, or set custom dimensions.
2. Check printer’s guidelines
When your artwork is ready, check if your printer’s guidelines for bleed, safe area, rich black, crop marks etc. At Jump, ours are:
- 3mm bleed
- 5mm safe zone recommended
- Rich black: C40 / M30 / Y30 / K100.
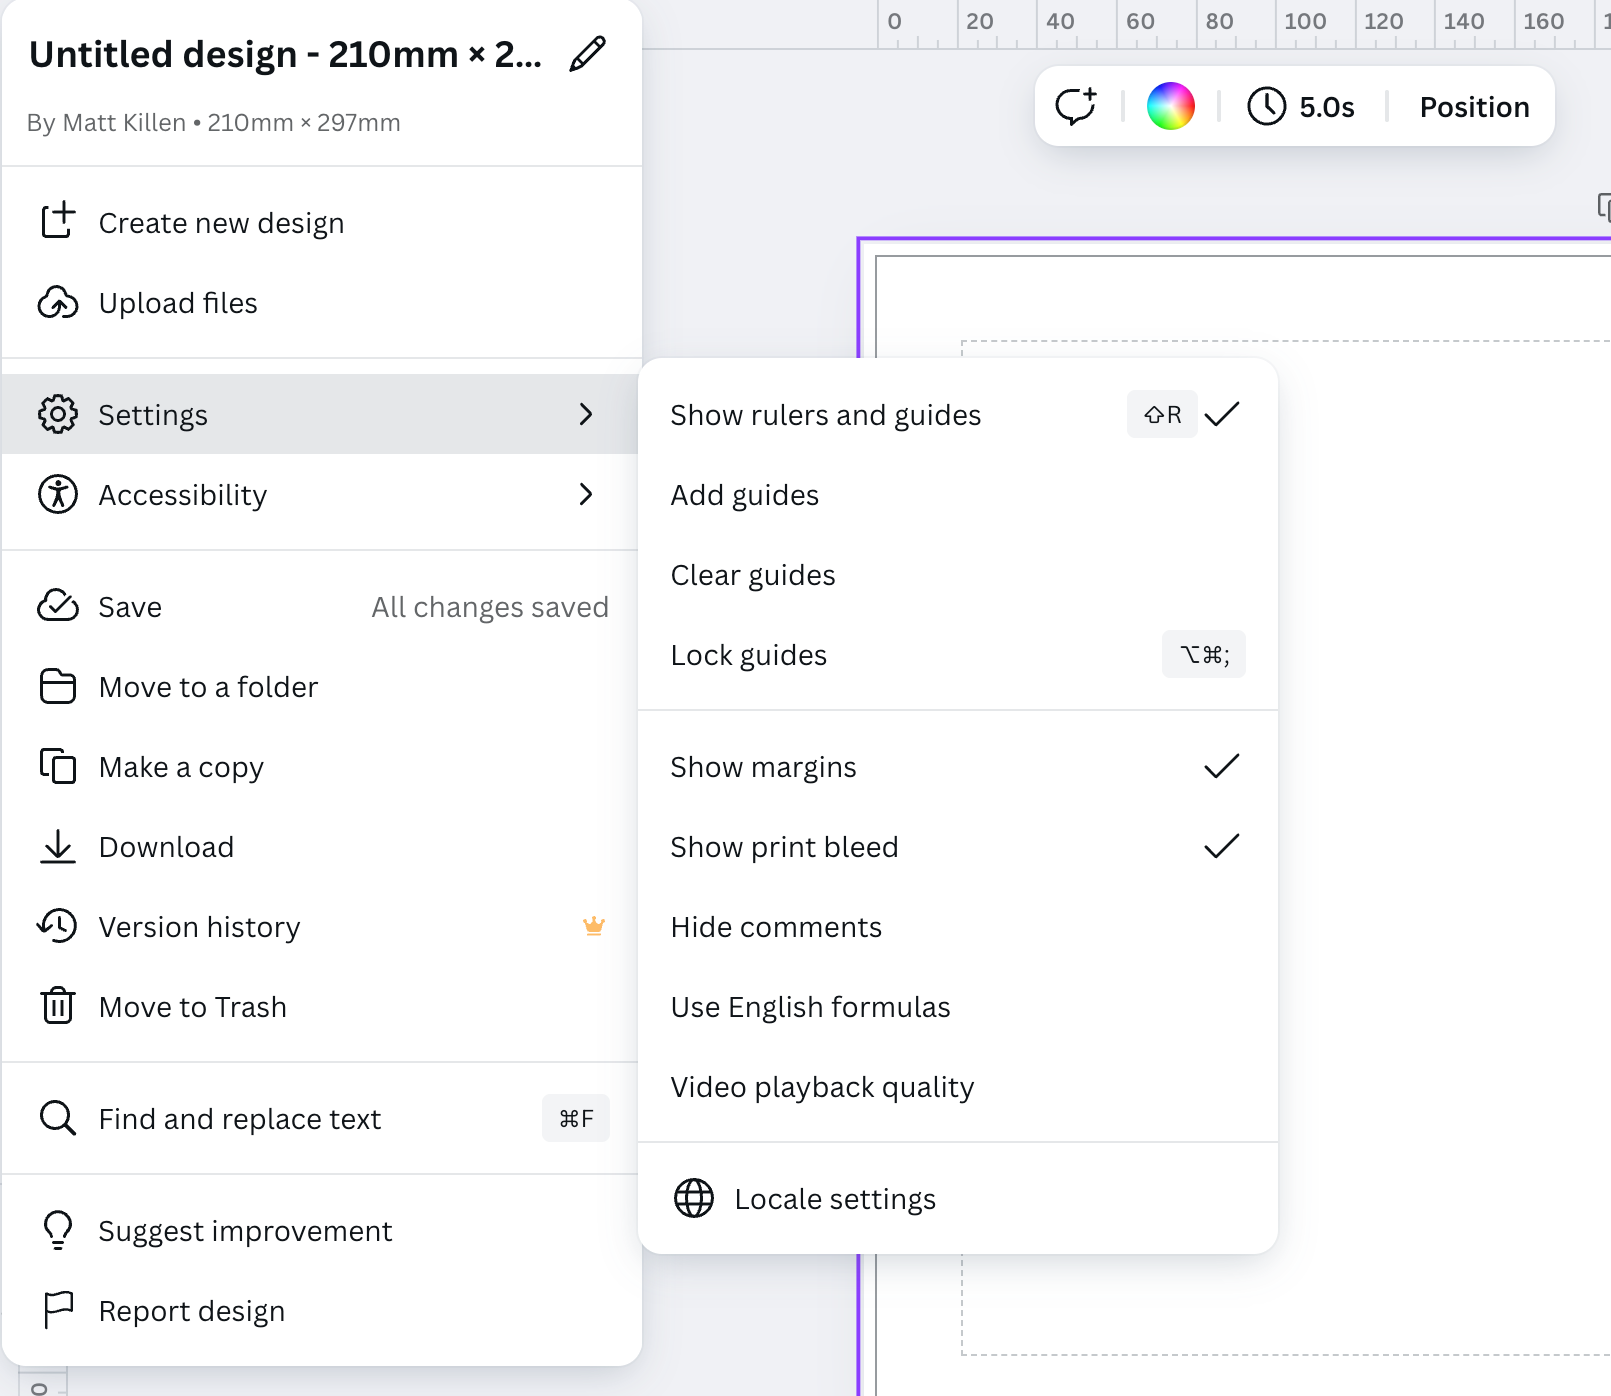
3. Set margins and bleeds
Go to File > Settings > Show margins. You can edit these margins by selecting Show rulers and guides on the same page and dragging the margins from there. Still on the same page, select Show print bleed to activate Canva’s default 3mm bleed.
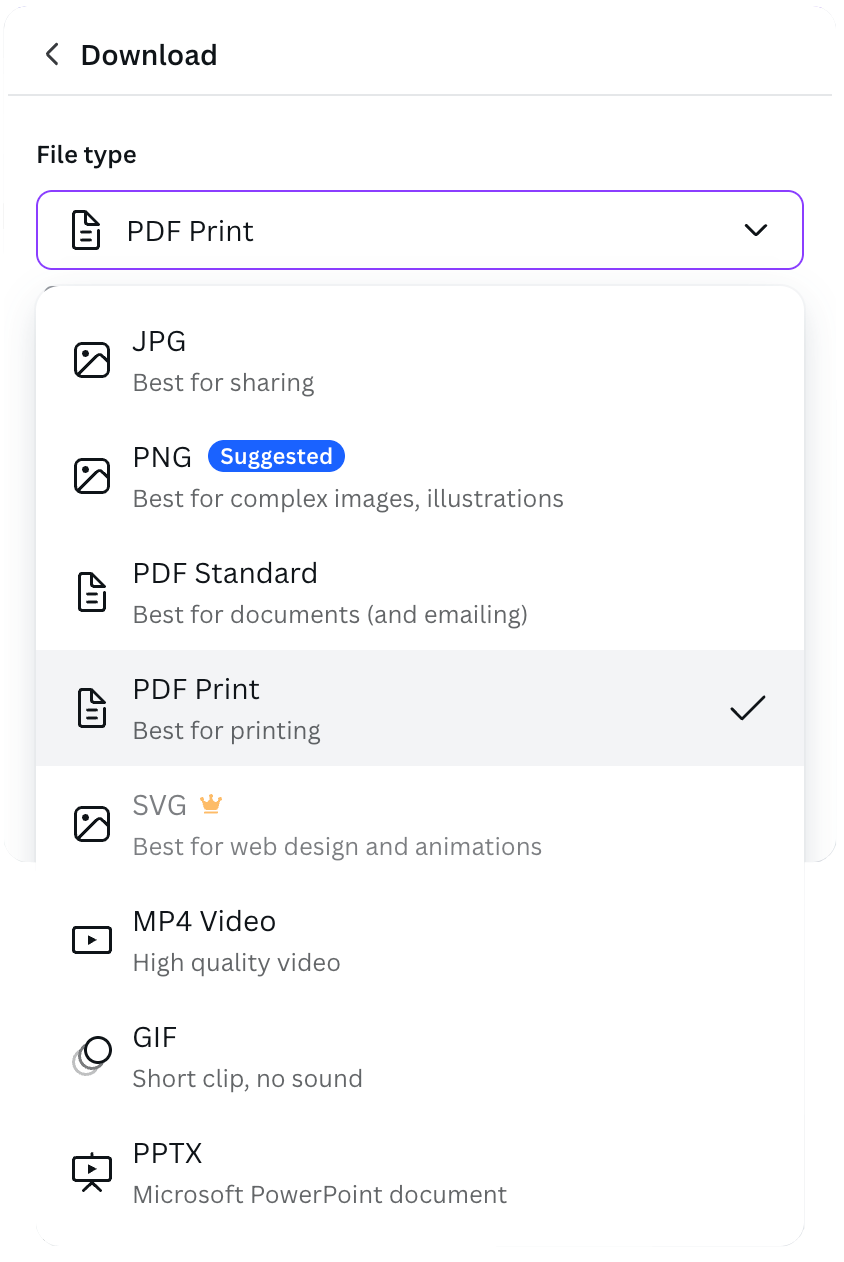
4. Export in the right format
You’re now ready to export your file! Select Share >Download > File type and switch it to PDF Print.
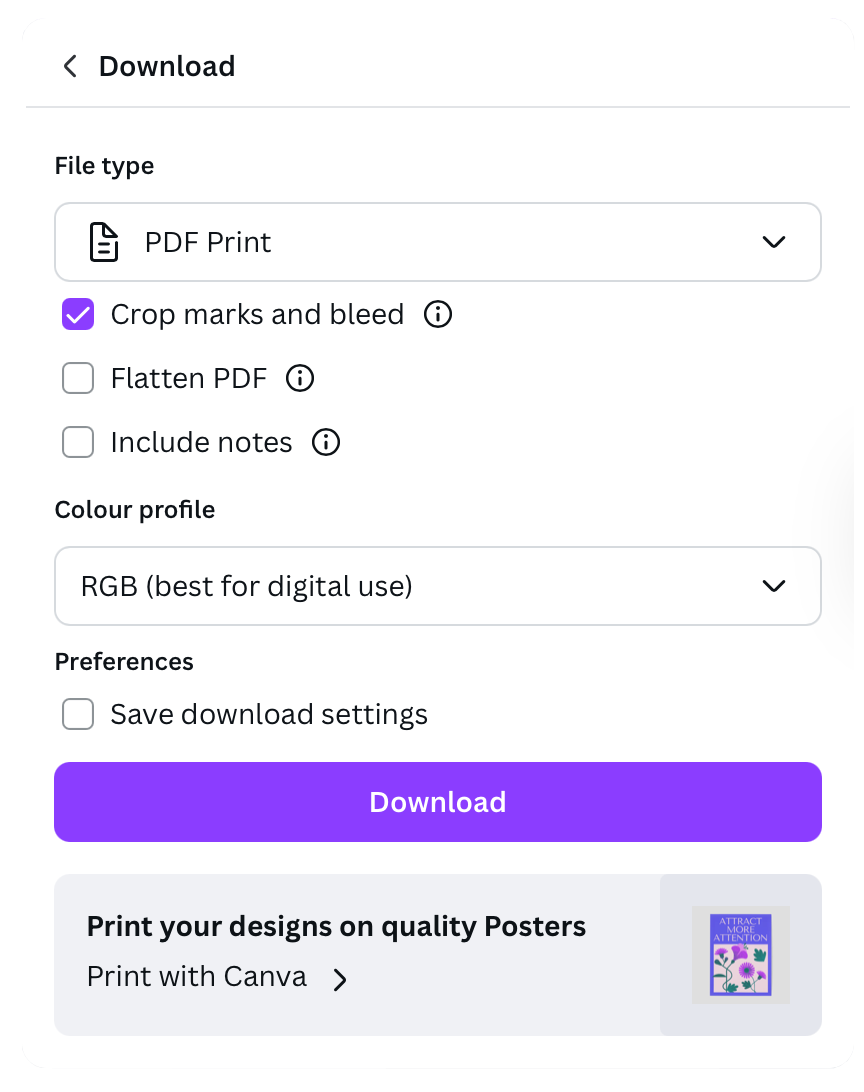
5. Set crop marks
To set crop marks and bleeds, select Crop marks and bleed under File type. You’ll only see these options after choosing PDF Print as your file type.
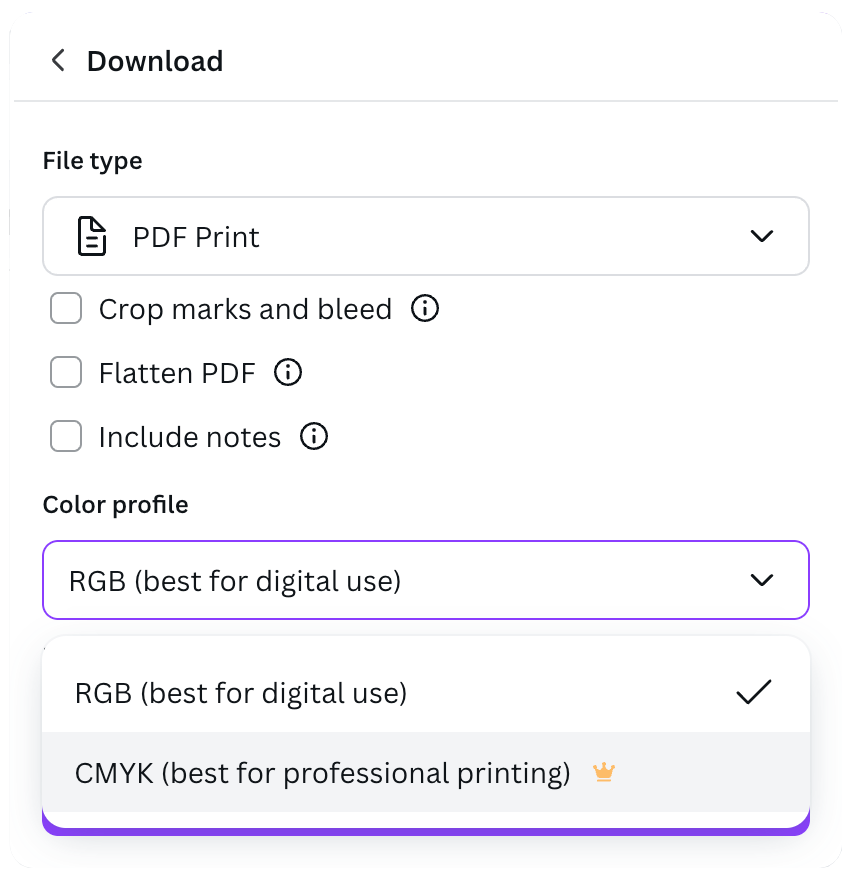
6. Switch from default RGB to print-friendly CMYK
On the same page as Steps 4-5, under Colour type, select CMYK from the dropdown menu. Note, this feature is only available for Canva Pro, Canva Teams, Canva for Education, and Canva for Nonprofits users.
7. Final checks
Double, triple, quadruple check that you’re happy with your artwork before sending.
And there you have it! This is how to properly set up a Canva file for print to guarantee the best results.
Common mistakes we encounter at Jump (and how to avoid them)
Working with businesses of all sizes across a wide range of industries, there are some common mistakes we see popping up from time to time. Here are the most frequent ones, and how to avoid them.
Mistake 1: No bleed
When printing on larger sheets that will need to be cut down, the cutting process always involves a slight margin of error. Without bleed, you might notice unsightly white edges or borders around your design where the paper wasn't fully covered. Remembering to set a bleed of a few millimetres (Canva’s default 3mm bleed will do just fine) before sending your file for print will ensure a clean edge.
Mistake 2: File is the wrong size
Before you begin designing, check that the file you have selected is the correct size for the print project you have in mind.
Mistake 3: Wrong colour mode selected
Have you designed your file in the correct format and set a bleed? Great! Before exporting, make sure you have switched the colour mode from RGB to CMYK to avoid unexpected colour shifts when printing.
Mistake 4: Black not being actually black
You read that right: you might be choosing the wrong black for your print jobs. While that is often due to the document being set to RGB, you should avoid using “registration black” made of all four CMYK colours (C100 / M100 / Y100 / K100); instead, ask your printer what their preferred “rich black” formula is (ours is C40 / M30 / Y30 / K100).
Contact us at hello@wearejump.co.uk to receive a quote for your next print project today!